Layers
Sigma renders the graph on multiple layers. Some layers are using WebGL, some are using Canvas.
List of existing layers
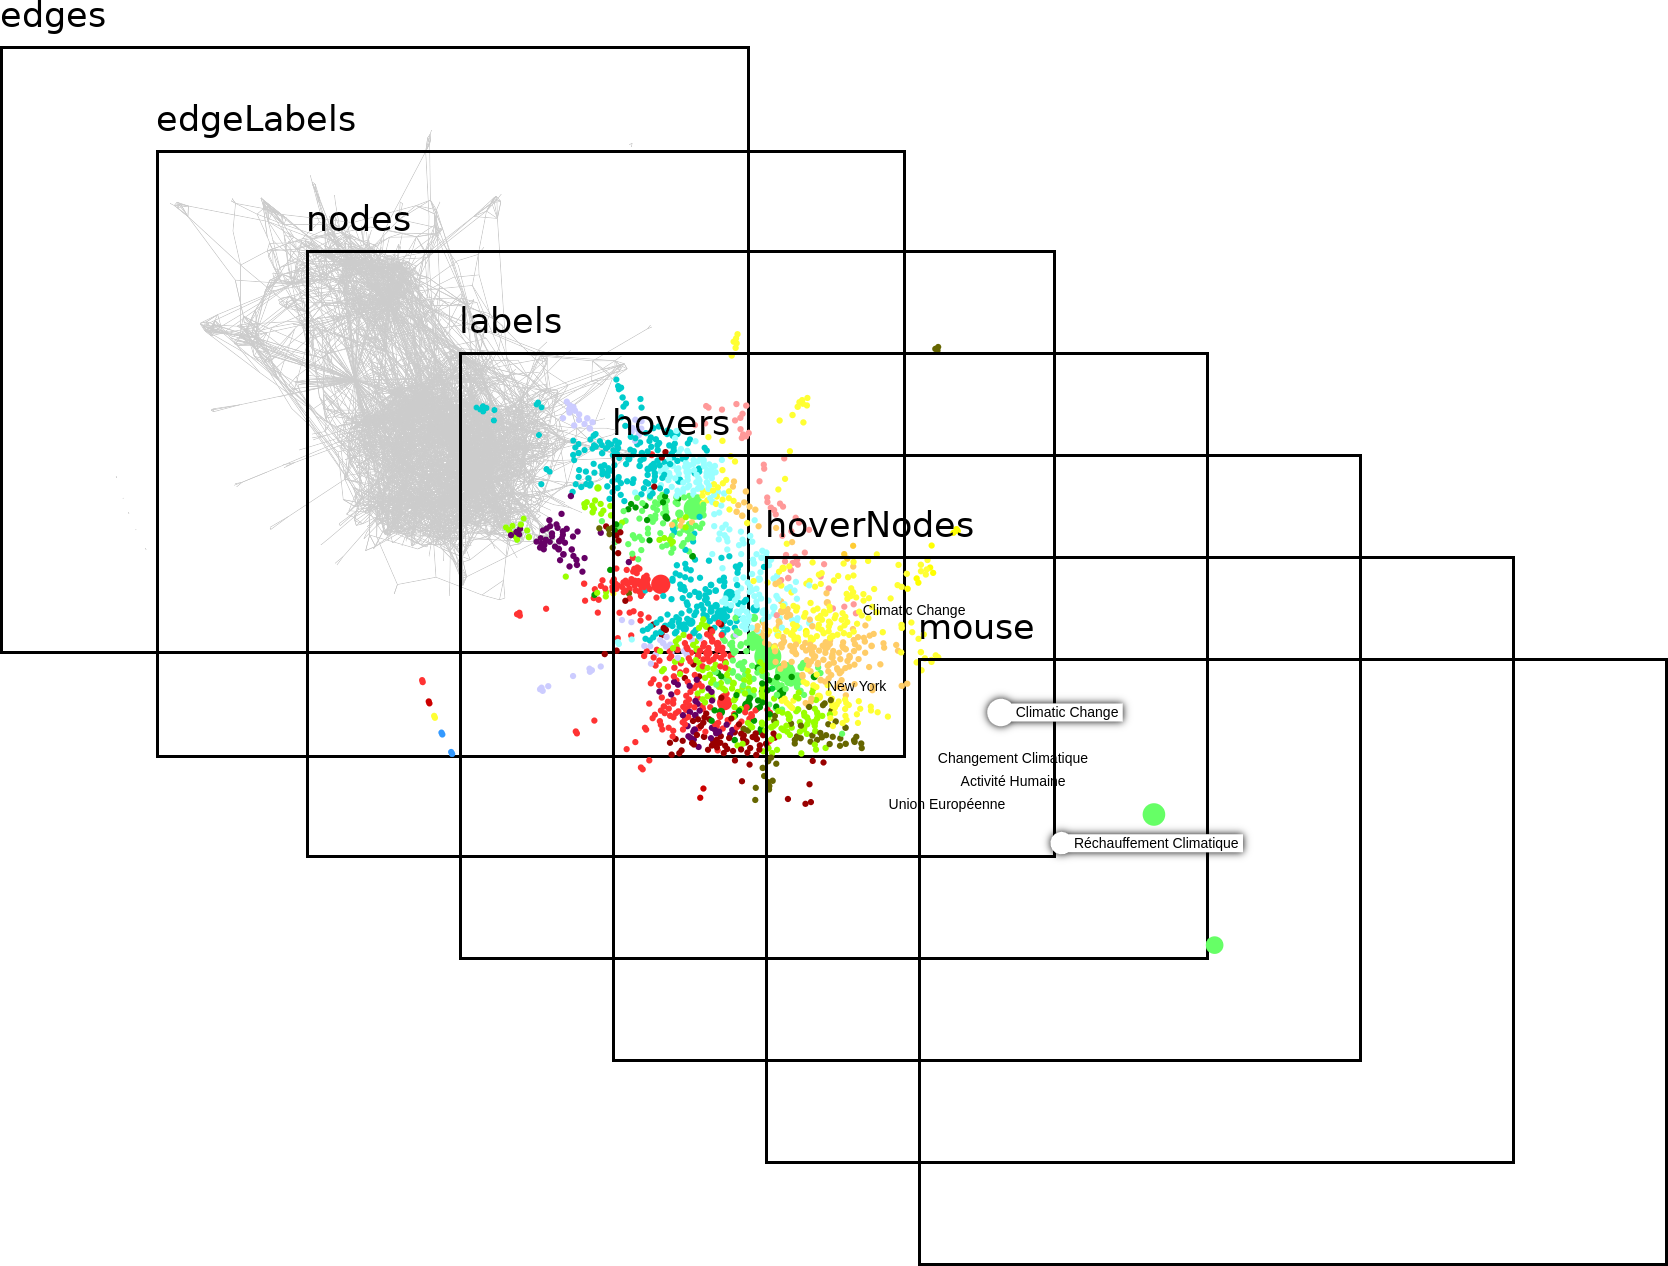
sigma-edges(WebGL)sigma-edgeLabels(Canvas)sigma-nodes(WebGL)sigma-labels(Canvas)sigma-hovers(Canvas): This layer draws the hovered and highlighted node labels, with the related backgrounds.sigma-hoverNodes(WebGL): This layer renders the hovered and highlighted nodes again, but on top of thesigma-hoversCanvas layer.sigma-mouse: This layer is just here to listen to interaction events.
Manipulating layers
By default, all these layers are simply put in the sigma container, with position: absolute; and inset: 0;. There are multiple ways to manipulate these layers! Here are some examples:
Putting layers behind the mouse layer
It is sometimes useful to add new layers on top of the sigma graph, but without altering the interactions. It is for instance the case in the Events story, where we want to display the events log, on top of the graph, but without breaking the graph interactions.
To do this, the simplest method we could find was:
- Insert the logs container after the sigma container in the DOM, also with
position: absolute; inset: 0; - Put the
sigma-mouselayer back on top, simply usingz-index: 1;
You can check this example's sources here.
Creating new layers and inserting in the right spot
For the Adding label on clusters story, we chose to insert the custom HTML layer, directly using the DOM APIs:
myCustomLayer.insertBefore(clustersLayer, sigmaContainer.querySelector(".sigma-hovers"));
You can check this example's sources here.
Creating new Canvas or WebGL layers
It is also possible to create new layers, directly using sigma's APIs. Sigma exposes a createCanvas method, to create a new Canvas HTML element. This method accepts beforeLayer and afterLayer options, that take a layer class. Then, the methods createCanvasContext and createWebGLContext allow retrieving the proper context from the Canvas element.
The main advantage of this method is that the layer will be properly removed when the kill method is called.
A good example of this method is in the @sigma/layer-webgl package, that both creates the context and destroys it when needed.